

The MotorPort is whichever port the corresponding motor is plugged into. If the wheel motor is mounted backwards, like Norris was, you just click the ReversePolarity box to automatically flip the signal. I didn't specify the distance between the wheels and the program still worked great. This is used to calculate a more accurate control/feedback data.

The Xbox controller must be configured. It's pretty simple; set to PlayerOne.
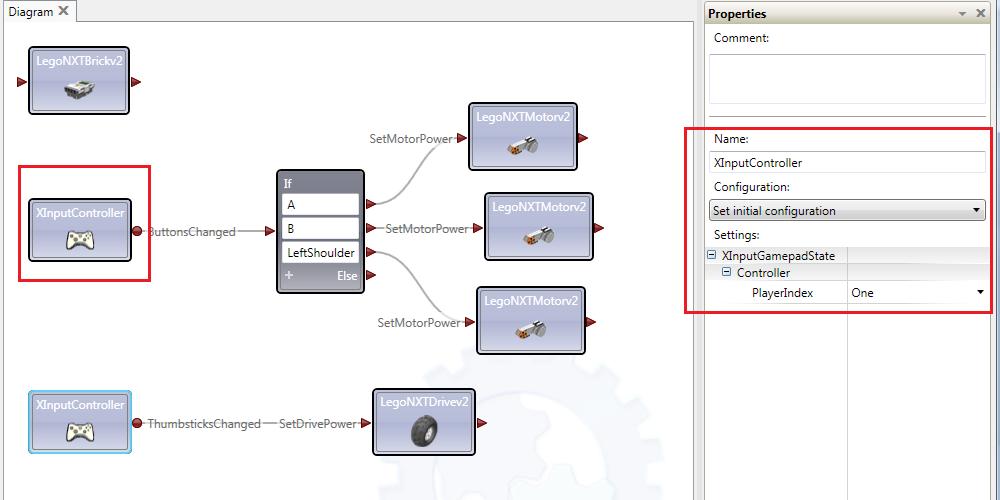
Next is the driving controls. Norris implements a differential drive; the left joystick's Y-axis controls the speed/direction of the left wheel and the same for the right joystick and right wheel.A line is drawn from the Xbox box and the LegoNXTDrive and this dialog box will appear. The ThumbsticksChange command is alerted and what you want to connect that to is the DrivePower. This'll also work for the DriveSpeed. The thumbstick range is -1 to 1 and so is the drive power/speed. Convenient in that you don't have to do any scaling between the two functions.

The spinning streetsweeper method of the front of Norris is actually able to go forwards, backwards, or completely stopped. I used the 'A' to go forward , 'B' to brake, and the top left should button to reverse the spin. The if statement is implement to see which button has been pressed and steer the appropriate respond.

As a sidenote, when you click to fill out one of the If-statement conditions, a drop-down menu of available variable data appears. Very nice if you're unsure of the proper name of the button you're looking for.

A Motor brick is used to control the spinning sweep. All the Motor bricks on the screen are the same. It's set up similar to the Drive brick above.

Each button controls the speed of the spinning motor:


There you have it: a fully functioning, wireless controlled robot. Over the next few posts, I'm going to cover the C# approach to Lego Mindstorms and intereacting with all their available sensors.
No comments:
Post a Comment